How to Link Multiple Bank Accounts to One UPI App – Complete Guide
Are you tired of juggling multiple bank accounts? Dealing with different login credentials and passwords can be a hassle. UPI apps have made managing your finances easier.
Imagine linking all your bank accounts to one UPI app. This way, you can make transactions, check balances, and pay bills with just a few taps. In this guide, we’ll show you how to link multiple bank accounts to one UPI app. We’ll cover the benefits, what you need, and how to do it step by step.
Key Takeaways
- Understand the benefits of linking multiple bank accounts to one UPI app.
- Learn the prerequisites for linking bank accounts.
- Follow step-by-step instructions to link your accounts.
- Discover how to manage your finances efficiently with UPI apps.
- Explore the security features of UPI apps.
Understanding UPI and Its Benefits
UPI is a big deal in digital payments. It’s clear why many people prefer it.
What is UPI?
UPI, or Unified Payments Interface, lets you send money between bank accounts with your phone. You don’t need to remember long bank details. It’s easy and safe.
Benefits of Using UPI
Using UPI has many perks. Convenience is a big one, as it lets you handle many accounts in one app. Speed is another plus, with quick transactions for urgent needs. Plus, it’s secure, keeping your info safe.
It also makes it easy to link multiple bank accounts to one UPI app. This is great for those with many accounts, as it simplifies managing them.
Prerequisites for Linking Bank Accounts
Before you can link multiple bank accounts to a UPI app, there are a few things to do first. Making sure you meet these requirements will help the process go smoothly.
Verification Requirements
To link your bank accounts, you must verify your identity. You’ll need to give your mobile number, which should be linked to your bank. Some UPI apps might ask for more, like OTP verification or biometric checks.
Verification Methods:
- Mobile Number Verification
- OTP Verification
- Biometric Authentication
Necessary Documentation
You’ll need to provide some documents to link your bank accounts. These usually include:
Document Type | Description |
ID Proof | Aadhaar Card, PAN Card, or Passport |
Address Proof | Utility Bills, Aadhaar Card, or Passport |
Bank Account Details | Account Number and IFSC Code |
Compatible Bank Accounts
Not all bank accounts work with UPI apps. You should check if your bank is on the UPI app’s list. Most big banks are, but it’s wise to double-check.
Here’s a quick checklist to ensure compatibility:
- Check if your bank is listed on the UPI app’s supported banks list.
- Ensure your bank account is active and in good standing.
- Verify that your account is eligible for UPI transactions.
Step-by-Step Guide to Linking Bank Accounts
We’ll show you how to link multiple bank accounts to one UPI app. This makes managing your money easier. You can send money, check balances, and more across different accounts.
Downloading Your Preferred UPI App
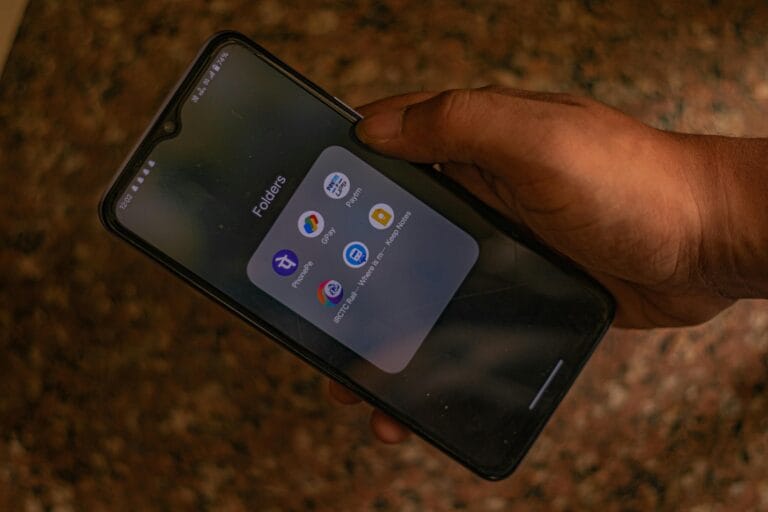
First, download your favorite UPI app from the app store. You can choose from Google Pay, PhonePe, or Paytm. Just search for the app, click “Install” or “Get,” and you’re set.
Initial Setup Process
After downloading, open the app and start the setup. You’ll need to enter your mobile number and verify it with an OTP. Rahul Chari, VP of Product at PhonePe, said, “The setup is quick and secure for a smooth start.”
“The future of digital payments is all about convenience, security, and ease of use,” said
Adding Your First Bank Account
To add your bank account, go to the “Add Account” section in the app. Choose your bank and enter your account details. The app will then guide you through verification, which might ask for your debit card or net banking info.
- Select your bank from the list provided in the app.
- Enter your account details as prompted.
- Verify your account through the method specified by the app.
By following these steps, you can link your bank account to your UPI app. This makes managing your finances more efficient.
Linking Additional Bank Accounts
Linking more bank accounts to your UPI app makes managing money easier. It lets you handle different accounts from one place. This way, you can keep track of your finances better.
Choosing the Right Bank Account
When picking a bank account to link, think about a few things:
- Account Type: Savings, current, or other types of accounts.
- Transaction Frequency: Accounts used often for transactions.
- Balance: Accounts with big balances.
Considering these points helps you manage your finances well. It makes your UPI app more useful.
Steps to Add More Accounts
To add more bank accounts:
- Open your UPI app and go to the account linking section.
- Choose the option to add a new bank account.
- Enter your account details as prompted.
- Use the required method to verify your account.
This process is easy and safe. It ensures your accounts are linked securely.
Common Issues and Solutions
Some common problems you might face include:
- Verification Failure: Check your account details and try again.
- Technical Glitches: Try restarting the app or reach out to customer support.
Knowing these issues and their fixes helps you troubleshoot well. You can use your UPI app smoothly without big problems.
Managing Linked Bank Accounts
Linking multiple bank accounts to your UPI app is just the start. Managing them well is key for a smooth financial experience. It helps you track your money, make payments easily, and keep your accounts safe.
How to View Linked Accounts
To see your linked bank accounts, open your UPI app. Go to the ‘Accounts’ or ‘Linked Accounts’ section. You’ll find a list of all connected bank accounts. You can check account numbers, types, and balances.
Editing Account Details
To edit a linked bank account’s details, follow these steps:
- Open your UPI app and go to ‘Accounts’ or ‘Linked Accounts’.
- Pick the account you want to edit.
- Tap ‘Edit’ or ‘Modify’.
- Change the account nickname or default settings as needed.
- Save your changes.
Removing a Linked Account
To remove a linked bank account, follow these steps:
- Go to ‘Accounts’ or ‘Linked Accounts’ in your UPI app.
- Choose the account you want to remove.
- Tap ‘Remove’ or ‘Delete’.
- Confirm by using your UPI PIN or other security.
Remember, removing a bank account from your UPI app doesn’t close it. It just stops it from being linked to UPI.
Action | Steps | Notes | ||
View Linked Accounts section | 1. Open UPI app | 2. Go to 'Accounts' | View account details and balances | |
Edit Account Details | 1. Select account | 2. Choose 'Edit' | 3. Update information | Update nicknames, default settings |
Remove Linked Account | 1. Select account | 2. Choose 'Remove' | 3. Confirm removal | Does not close bank account |
Troubleshooting Common Linking Issues
Linking multiple bank accounts to a single UPI app is usually easy. But, it’s important to know how to fix common problems. UPI apps aim to make money transfers simple, but sometimes issues come up.
Account Verification Failures
One big problem is when account verification doesn’t work. This might happen if you enter wrong details or if the info doesn’t match. Make sure the account info you give is correct. If it still doesn’t work, try again or ask your bank for help.
A banking expert says, “Getting your account details right is key for verification to succeed.” Checking your info twice can prevent a lot of trouble.
Technical Glitches
Technical problems can also stop you from linking accounts. These might be because of server issues, app updates, or network problems. Try closing and reopening the app or check for updates. If it still doesn’t work, contact the app’s support team.
“Technical issues are an unfortunate reality, but most can be resolved with simple troubleshooting steps.”
Contacting Customer Support
If you can’t fix the problem yourself, it’s time to reach out to customer support. Most UPI apps have support teams ready to help. Look for the ‘Help’ or ‘Support’ section in the app to find how to contact them or submit a ticket.
- Tell the support team about your problem and give them all the details.
- Do what the support person tells you to do to fix your issue.
By tackling these common problems, you can make linking bank accounts to a UPI app easier. Remember, being patient and persistent helps a lot when you’re troubleshooting.
Security Measures for UPI Transactions
As we rely more on UPI for our money dealings, keeping our transactions safe is key. It’s vital to protect our financial info and stop unauthorized access.
Protecting Your Personal Information
Keeping your personal info safe is the first step against security threats. We must be careful with sharing sensitive info, like our UPI PIN or bank details. Legit banks and UPI services won’t ask for this info via email, phone, or SMS.
Best practices include:
- Use strong, unique passwords for your UPI app and bank accounts.
- Don’t use public Wi-Fi for UPI transactions.
- Keep your UPI app updated to the latest version.
Enabling Two-Factor Authentication
Turning on two-factor authentication (2FA) adds more security to your UPI deals. 2FA means even if someone gets your password, they can’t get into your account without the second check. This could be a one-time password (OTP) or biometric checks like fingerprints or facial scans.
“Two-factor authentication is not just a feature, it’s a necessity in today’s digital landscape.”
Safe Practices for Online Transactions
Safe habits are crucial for UPI transactions. Always check the recipient’s details before sending money. Make sure you’re using the real UPI app from trusted places like Google Play or Apple App Store.
Also, it’s wise to:
- Keep an eye on your account activity.
- Tell your bank about any odd transactions right away.
- Update your device’s OS and security software regularly.
By sticking to these safety tips, we can lower the risks of UPI transactions. This way, we can enjoy the benefits they offer.
Best Practices for Using UPI with Multiple Accounts
To get the most out of UPI with multiple bank accounts, follow some key steps. It’s all about organizing your money, keeping an eye on your spending, and using your UPI app’s features fully.
Organizing Your Finances
Having many bank accounts linked to one UPI app means you need to stay organized. Try grouping your accounts by their use, like for daily spending, saving, or business. This makes it easier to track your money.
Tips for Organizing:
- Label each account clearly within the app.
- Use different accounts for different financial goals.
- Regularly review your account balances and transactions.
Setting Up Spending Alerts
Spending alerts help you keep an eye on your money. They notify you of transactions in real-time. Most UPI apps let you set up alerts based on the amount, type, or how often you spend.
Benefits of Spending Alerts:
- Immediate notification of large or suspicious transactions.
- Better tracking of your daily expenses.
- Enhanced security against fraudulent activities.
Utilizing Features Effectively
UPI apps have many features to make managing money easier. From paying bills to sending money, knowing how to use these can improve your UPI experience.
Feature | Description | Benefit |
Bill Payments | Pay utility bills, credit card bills, etc., directly through the app. | Convenience and timeliness in bill payments. |
Fund Transfers | Transfer money between accounts or to other users. | Quick and secure way to move funds. |
Spending Analytics | View detailed reports of your spending habits. | Better understanding and management of your finances. |
By following these tips, you can make the most of UPI with multiple bank accounts. It’s all about smart money management with the right tools and strategies.
Read Also :- Best UPI Apps in India 2025 – Features, Limits & Safety Tips (PhonePe, Google Pay, Paytm, BHIM & More)
Overview of UPI Transaction Fees
Using a UPI app with multiple bank accounts means knowing about transaction fees. These fees can change based on the bank and the transaction type.
Understanding Fees for Different Banks
Every bank has its own fee rules for UPI transactions. Some banks might charge a small fee for certain transactions. Others might not charge anything. It’s important to ask your bank about their fees.
Bank | Transaction Type | Fee |
Bank of India | Fund Transfer | Free |
State Bank of India | Bill Payment | ₹1 per transaction |
HDFC Bank | Fund Transfer | Free |
What to Expect with Each Transaction
Every UPI transaction comes with a fee, based on the bank and transaction type. Knowing these fees helps you manage your money better.
- Fund transfers: Some banks might charge a small fee, while others don’t.
- Bill payments: Some banks might charge for bill payments, while others don’t.
- Merchant payments: Some banks offer cashback or rewards for these payments.
Minimizing Costs
To cut down on UPI transaction costs, you can:
- Choose a bank with low or no UPI transaction fees.
- Use a UPI app that gives cashback or rewards for certain transactions.
- Try to avoid making unnecessary transactions.
By knowing about UPI transaction fees and how to reduce them, you can get the most out of using a UPI app with multiple bank accounts.
Comparing UPI with Other Payment Methods
Understanding the differences between UPI and other payment methods is key. We’ll look at UPI compared to credit and debit cards, and digital wallets. We’ll discuss their good and bad points.
UPI vs. Credit and Debit Cards
When you think about UPI versus credit and debit cards, several things matter. UPI lets you send money straight from your bank account. This means less chance of fraud and card skimming.
Feature | UPI | Credit/Debit Cards |
Direct Bank Transfer | Yes | No |
Card Skimming Risk | No | Yes |
Transaction Fees | Low to None | Variable |
Financial experts say UPI’s direct transfer cuts down on card risks.
“The future of payments is in real-time transactions, and UPI is at the forefront of this revolution.”
UPI vs. Digital Wallets
Digital wallets are popular for their ease of use. But how do they compare to UPI? UPI apps give you more control over your bank accounts.
- UPI apps can be linked to multiple bank accounts.
- Digital wallets often require pre-loading of funds.
- UPI transactions are typically more straightforward.
Pros and Cons of Each Method
Each payment method has its own advantages and disadvantages. UPI is secure and lets you access your bank account directly. But, it might not be accepted everywhere.
Credit and debit cards are widely accepted. Yet, they carry fraud risks and extra fees.
Digital wallets are convenient and offer rewards. But, they need funds loaded beforehand and have limits on how much you can spend.
In conclusion, picking a payment method depends on your needs and preferences. Knowing the good and bad of UPI, credit/debit cards, and digital wallets helps you choose wisely for your financial situation
Conclusion: Simplifying Your Finances with UPI
Linking many bank accounts to one UPI app makes managing money easier. This guide shows you how to use UPI for simpler transactions.
Key Takeaways
We’ve talked about linking bank accounts to UPI apps. This includes what UPI is, what you need, and how to link accounts. These steps help you organize your money better and use UPI’s benefits.
Getting Started with UPI
Now you know how to link bank accounts to UPI apps. Download your favorite app, set it up, and link your accounts. UPI makes managing money easier and more efficient.
Effective Financial Management
Using UPI and linking accounts improves your money management. Set up alerts, use features wisely, and track your spending. This keeps your finances in order.
FAQ
Q.1 How do I link multiple bank accounts to one UPI app?
To link multiple bank accounts to one UPI app, follow the in-app instructions. You’ll need to verify your identity, add each bank account, and confirm the details.
Q.2 Can I link bank accounts from different banks to the same UPI app?
Yes, you can link bank accounts from different banks to the same UPI app. Just make sure the banks are compatible with the UPI app.
Q.3 What are the benefits of linking multiple bank accounts to one UPI app?
Linking multiple bank accounts to one UPI app makes managing your finances easier. You can make transactions from different accounts and track your spending in one place.
Q.4 Are there any fees associated with linking multiple bank accounts to a UPI app?
Check with your bank and the UPI app provider about any fees for linking multiple accounts. Fees can vary.
Q.5 How do I manage multiple bank accounts linked to my UPI app?
To manage multiple bank accounts in your UPI app, view account balances and transaction history. You can also set up spending alerts within the app.
Q.6 What should I do if I encounter issues while linking my bank accounts to the UPI app?
If you face issues linking bank accounts, try the troubleshooting steps provided by the UPI app. If problems persist, contact the app’s customer support for help.
Q.7 Is it safe to link multiple bank accounts to one UPI app?
Yes, linking multiple bank accounts to one UPI app is safe. UPI apps use strong security, like encryption and two-factor authentication, to protect your transactions and data.
Q.8 Can I remove a linked bank account from my UPI app?
Yes, you can remove a linked bank account from your UPI app. Just go to the account settings and follow the removal process.
Did You Find This Helpful?
If you liked this post or found it useful, please share it with your friends and family.
Your one share can help someone save money and make better financial decisions!
Spread the word — Sharing is caring!